Showing posts with label Almond. Show all posts

Tuesday, January 31, 2012

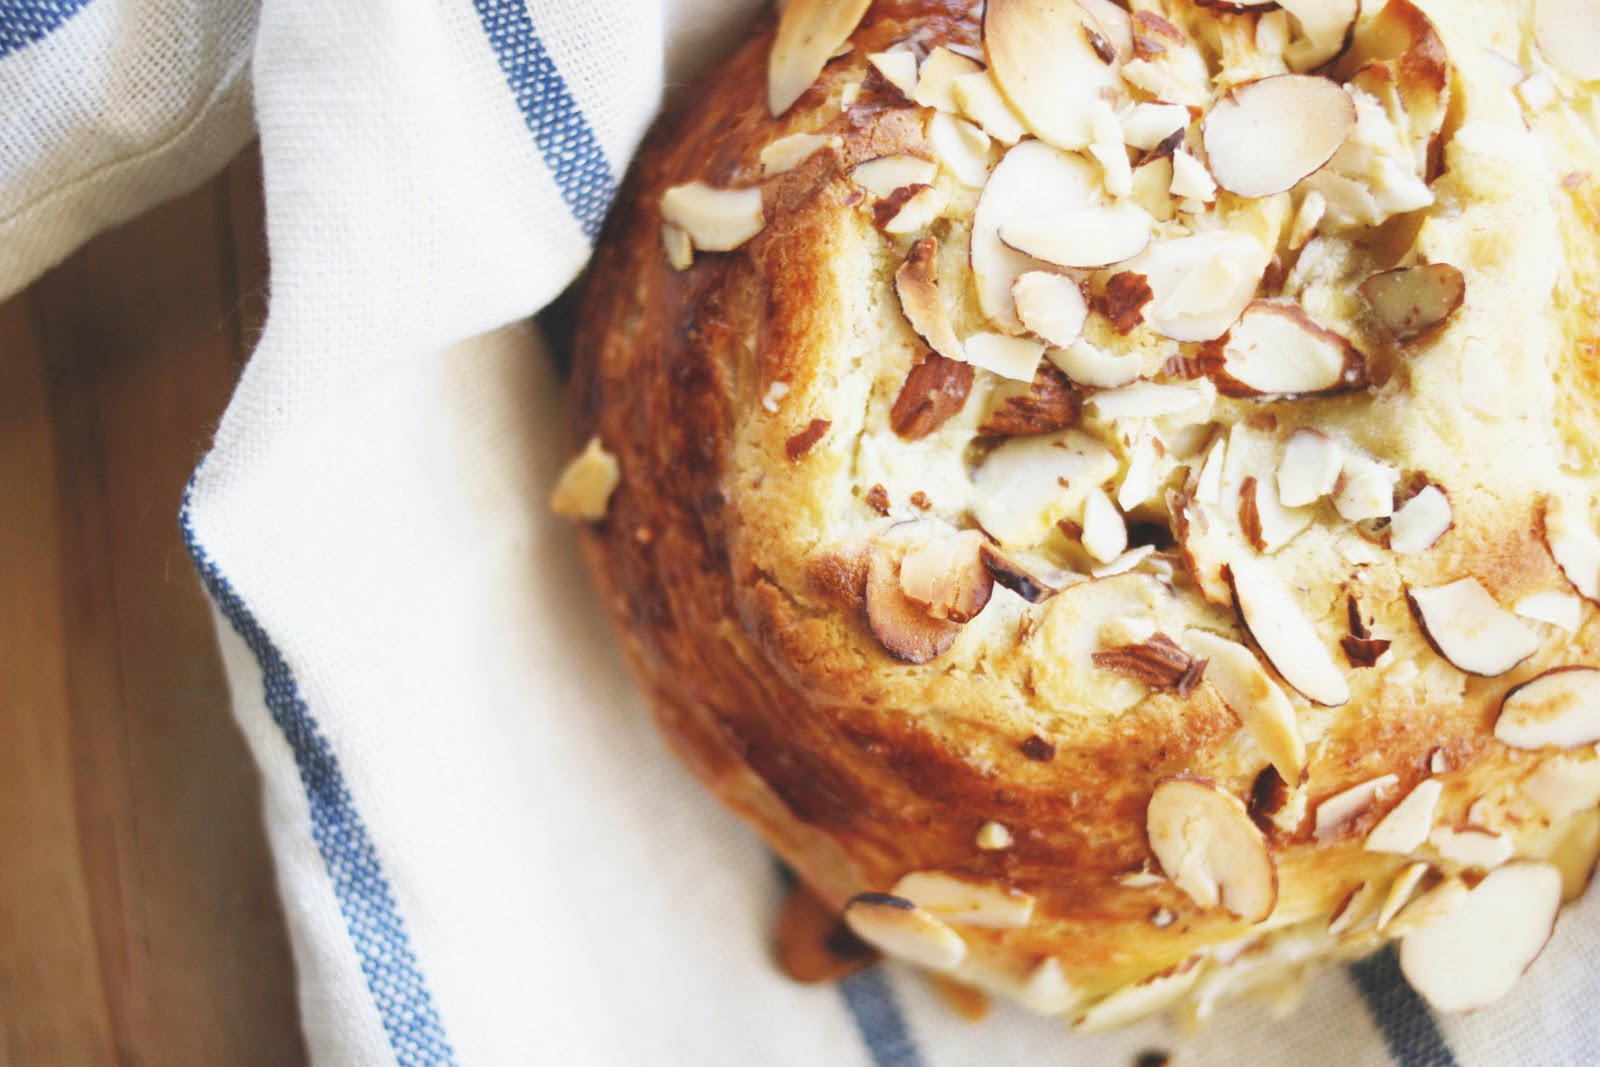
Almond Custard Buns


There's one thing I know I love, and it's almond pastries. Give me an almond croissant, almond frangipane, financiers, almond tarts and I'm a very happy girl. There's one thing I also know about my family: they love me most when I make them almond pastries, so what can a girl do but make some almond pastries for her family?


The other thing I know is that almonds are expensive - especially almond flour! Which, sucks because I use almond flour ALL of the time. I'm a lucky girl who was fortunate enough to have Oh Nuts! provide me with plentiful amounts of almond flour to satisfy all of my almond-related baking needs. I'm not even just saying this because I was fortunate enough to get their products sponsored, but because their products are awesome quality. Their almond flour is perfectly and evenly ground, and I cannot say the same when I try to ground almonds myself. They also have great prices, compared to Bob's, which I've also tried. Safe to say, if I ever need almond flour again, I know where I'll be purchasing it from ;)

But, on to my FAVORITE recipe on earth, at the moment anyway... almond custard buns! This is the easiest and most delicious pastry I've ever tried. Literally, the whole thing is pulsed together in a food processor, quickly mixed together and refrigerated for up to 4 days. So if you're in a real pinch, you can make this days ahead and not even worry about it! It's truly sublime...

I added my two favorite things inside: custard and almond paste, baked it and blissfully enjoyed the fruits of my labor... over and over again.

P. S. Stay tuned for the coconut-raisin custard version of this pastry!
P. S. S. Purchase from Oh Nuts! here.


Almond Custard Buns
Yields: 24 buns
Adapted from here.

For the food processor Danish pastry:
1/2 cup warm water
1 cup milk, room temperature
2 large eggs, room temperature
4 1/2 cups white bread flour
2 packages (1/4 oz.) rapid-rise yeast or 2 tbsn. fresh yeast
2 tsp. salt
6 tbsn. sugar
2 cups/ 4 sticks unsalted butter, cold, cut into thin sliced

For the almond filling:
1 7 oz. package almond paste
1 stick unsalted butter, room temperature
1/4 cup almond flour
1/2 cup all-purpose flour
2 eggs
1/2 tsp. almond extract

For the custard:
1 small package French vanilla instant pudding
3/4 cup heavy cream
1 cup whole milk
1 tsp. vanilla extract

1 cup sliced almonds, divided
1/2 cup sugar, divided
1 egg, whisked

To make the bun dough, pour the water and milk into a measuring cup. Add the egg, beating with a fork to mix, set aside. Set a large bowl near your food processor. Using your food processor, pulse the flour, yeast, salt and sugar to combine. Add the cold slices of butter, process briefly so the butter is cut up a little, though you still want to see visible chunks of at least 1/2" pieces. Transfer to the large bowl and quickly add the contents of the measuring cup. Use your hands or a rubber spatula to fold the ingredients together, but do not over mix. Expect to have a gooey mess with some butter lumps in it. Cover the bowl with plastic wrap, place in the refrigerator and leave it overnight or up to 4 days. 

To turn the dough into pastry, remove the dough from the refrigerator and let it come to room temperature. Dust your surface with bread flour and split the dough evenly in half, then roll each half into a 20" square. Fold the dough into thirds, like a business letter, turning it afterward so that the closed fold is on your left, like the spine of a book (it will still look very messy). Repeat this process 3 more times with each half; each time the dough will get smoother and better looking. Wrap each rectangle in plastic wrap and place in the refrigerator for 30 minutes. Or refrigerate half to use now and freeze the other half to use later.

To make the almond filling, cream together the almond paste and butter in a food processor until smooth. Add the eggs, one at a time until well combined. Add the almond flour, all-purpose flour and almond extract and pulse until combined and smooth. Set aside until needed. To make the custard, combine everything in a medium bowl and mix until combined and starts to thicken, about 3 minutes. Refrigerate until needed.

To assemble the buns, working with one rectangle of dough at a time, roll the dough into a 20" x 8" rectangle or loosely so. Spread half of the almond filling mixture across the whole rectangle. Spread half of the custard mixture on top of the almond filling, then sprinkle the whole surface with slivered almonds and 1/4 cup sugar. Roll the entire thing up like you would when making cinnamon rolls, long side in. Use your fingers to pinch the end of the roll into the dough to seal it, to ensure custard doesn't escape. Using a sharp knife, cut the long log into 12 equal pieces and place, swirl side up on a parchment-paper lined baking sheet. Repeat with the remaining rectangle of dough. You can separate each bun, leaving them 3" apart or you can have them all touch sides. It does not affect the baking time but it is up to you whether you want them to be separate or communal. Let the buns rise in a warm place for 45 minutes. Preheat the oven to 375 F. Before baking brush the buns with the whisked egg and sprinkle with more sliced almonds and sugar. Bake for 18 - 22 minutes or until golden brown.

Wednesday, February 2, 2011

How to Enjoy Mujaddara:


So… there's this thing I'm obsessed with. Most of the time, obsessions are unhealthy - riddled with heartbreak, non-sensical daydreams and horrible time management. Thankfully though, this time at least, I'm obsessed with something that's quite good for me… whew!


I'd like to introduce you to mujaddara aka moujadara aka mejadra aka megadarra aka it goes on and on! This little thing has a boat load of names but really, it's not as complicated as it makes itself seem. Mujaddara (the way I like to spell it) is a simple mixture of green lentils, rice and caramelized onions and it is, by far, one of the most delicious things I've come across. If you're unfamiliar with it, I can't stress enough how much I want you, wait, no - strike that - NEED you, to try this! I even left you here with three delicious ways to eat it - so you don't even have to think at all. Just let your body do all the work and your stomach do the enjoying!
{The recipe}

Mujaddara
Yields: about 8 - 10 servings
Original recipe from Zov: Recipes and Memories from the Heart.

1/3 cup vegetable oil
2 large onions, thinly sliced (about 6 cups)
5 3/4 cups water
2 cups dried green lentils
6 tbsn. (3/4 stick) unsalted butter, cut into pieces
2 cups long-grain white rice
2 tsp. salt
1 tsp. ground black pepper

Heat the oil in a deep large nonstick frying pan over medium heat. Add the onions and saute until they are deep golden brown and caramelized, about 45 minutes; set aside. Combine the water and lentils in a heavy large saucepan. Cover and bring the water to a boil over high heat. Decrease the heat to medium-low and simmer gently until the lentils are almost tender, but still firm to the bite, about 5 minutes. Stir in the butter, add the rice, salt and pepper. Cover and bring the cooking liquid to a boil again over high heat. Decrease the heat to medium-low and simmer until the rice and lentils are tender and the cooking liquid is absorbed (do not stir the mixture as it cooks), about 20 minutes. If some water remains unabsorbed, rem the saucepan from the heat and let it stand uncovered for 5 minutes. Fold the caramelized onions into the pilaf. 
{How to eat Mujaddara Pt. I}
This Moroccan salmon salad is divine. It's inspired by a salad from a restaurant called Zov's in Tustin and it's the most ingenious use of mujaddara I've seen to date. Take a moment to think about it: warm, comforting rice pilaf under a bed of fresh mixed greens in a tangy but sweet vinaigrette with bites of brine-y feta, juicy tomatoes and tender, spiced salmon. Yeah... I think that about sums that up.
The essential components:
Moroccan Salmon Salad
Yields: 4 servings
Inspired by a salad from Zov's: Cafe & Bakery in Tustin, California.

For the salad:
4 salmon filets, washed and patted dry
4 tsp. Moroccan spices (recipe below)*
10 cups of mixed baby greens
2 plum tomatoes, diced
3/4 cup crumbled French feta cheese
2 cups cooked mujaddarah (recipe above)

For the balsamic vinaigrette (this will make more than needed for the salad):
1/4 cup balsamic vinegar
1/4 cup rice vinegar
4 garlic cloves
2 tbsn. Dijon mustard
2 tbsn. finely chopped shallots
2 tbsn. pure maple syrup
1 tbsn. pomegranate molasses
1 1/2 tsp. salt
1 tsp. ground black pepper
1/2 cup canola oil

To make the vinaigrette, blend the balsamic, vinegar, rice vinegar, garlic, mustard, shallots, maple syrup, molasses, salt and pepper in a blender until smooth. With the machine running, gradually pour the oil in a thin stream until emulsified. Should keep for 3 days in an air-tight container in the refrigerator. Rub each salmon filet in 1 tsp. of Moroccan spice rub (or alternatively, you can do what I did below). Sear the filets on each side till cooked through, about 3 - 4 minutes on each side; set aside. In a large bowl, combine the mixed greens, feta cheese and diced tomato. Toss with just enough dressing to coat. Lay out 4 serving plates. Top each plate with 1/2 cup of warm mujaddara. Divide the salad among the four plates, then top each with a salmon filet. Enjoy!

* If you don't want to make the Moroccan spice mix, you can just sprinkle each salmon filet with a pinch of each spice listed below, which is what I did because I was too lazy to make the spice mix. 
Moroccan Spices
Yields: 3/4 cup
Original recipe from Zov: Recipes and Memories from the Heart.

3 tbsn. paprika
2 tbsn. dried thyme
2 tbsn. ground cumin
1 tbsn. ground nutmeg
1 tbsn. ground black pepper
1 tbsn. ground ginger
2 tsp. ground cinnamon
1 tsp. cayenne pepper
1 tsp. ground allspice

Stir all the ingredients in a small bowl to blend. Transfer to a jar and seal with a lid. 

{How to eat Mujaddara Pt. II}
When I saw this recipe, I wanted to make it immediately. Then I had this thought that popped into my head, it literally was one of those 'lightbulb' moments where you realize something so great your ego, not your head, seems to glow. I decided instead of stuffing the mushrooms with rice, such as in the recipe, I'd stuff it with mujaddara! Why not? Since it already is lovely with feta, I'd knew the combination would work and be even more lovely... and can I say, it was quite lovely. The perfect appetizer or it would make a great lunch on top of some baby greens.
Mujaddara & Feta Stuffed Mushrooms
Yields: 4 servings, as a side
Adapted from here.

12 large cremini mushrooms
olive oil
sea salt and black pepper
1 cup mujaddara (recipe above)
3 tbsn. feta
1 garlic clove
2 tbsn. parsley, finely chopped

Preheat the oven to broil. Place the mujaddara, feta, garlic, parsley in a bowl and stir to combine. Season with salt and pepper to taste, set aside. Remove all the stems from the mushrooms, discard and save and add to another meal some other day. Place the mushrooms, stem side down on  baking sheet and brush with olive oil. Place the mushrooms, stem side down in the oven about 4" from the top for 2 - 3 minutes. When they are done, flip them over, fill with the rice mixture and broil until the filling is hot, about 2 minutes. 
{How to eat Mujaddara Pt. III}
This recipe was inspired by one of my new favorite blogs, Cooking After Five. I stumbled upon it the other day, and I'm in love! The recipes, the photos, everything was right up my alley! Anyways I've been looking for new ways to eat my mujaddara and I had never seen it the way Nicole from Cooking After Five eats it here. Since I already had some herbed lebni in my fridge, I decided to play around with that and this is what I came up with. It's tangy, comforting and delicious, especially with the crunch from the slivered almonds. I simply love slivered almonds... add them to anything, and it will instantly be more delicious. Promise.

Mujaddara with Herb-Lebni Sauce

mujaddara (recipe above)
1 lemon, juiced
slivered almonds, toasted

To make the herb-lebni sauce, add the lemon juice to the lebni sauce to thin it out. Add some water to thin it out some more, to the consistency of a hollandaise sauce. Serve drizzled on top of the mujaddarah with some toasted, slivered almonds. 

Tuesday, September 28, 2010

"Best Ever Soft Chocolate Chip (Almond) Cookies"

A little rant: Blogger has really been annoying me lately! What's up with all the changes?! Now, change is not normally a bad thing but when you worked so hard to make your blog look a certain way and you begin to love it, it's totally not cool for Blogger to screw it all up! Ugh anyways... onto the post!
As a baker, you should have certain things in your arsenal, such as the perfect chocolate cake or the perfect pie crust, but really, the most important is the perfect chocolate chip cookie. I must be honest, I haven't tried very hard to find one, but maybe it's best I leave it to find me.


Though this isn't your traditional CCC, since I threw some chocolate covered almonds in, this cookie has got it happening. After stumbling upon this recipe from Lindsay Yeo's blog, I felt I had to make them, especially after reading her little link to the strange amount of flour used - it was so intriguing, so scientific, so me!
What drew me in was, not only did she title them "the best ever" but "the best ever SOFT chocolate chip cookies." I love soft cookies! Give me chewy and soft over crunchy any day! These are perfectly soft, just as she said they would be, but they did have just a bit of an outer crunch of a shell, which made them awesome.

The almonds added a nice crunch and had delicious almond scent from the extract. I threw them in because I had them on hand, but the next time I want to try a real almond chocolate chip cookie, I'll have to try these. And if you want the classic, go ahead and leave the almonds and extract out!
"Best Ever Soft Chocolate Chip (Almond) Cookies"
Yields: about 5 dozen
Adapted from here.

360 grams flour (about 2 3/4 + 1/8 cup) Scientific explanation here.
1 tsp. baking soda
1 tsp. salt
1/2 cup unsalted butter
1/2 cup sugar
1 cup packed brown sugar
2 tsp. vanilla extract
1/2 tsp. almond extract
2 large eggs
1/2 cup semisweet chocolate chips, chopped
1 1/2 cups chocolate covered almonds, roughly choppped

Combine the flour, baking soda, and salt in a small bowl. Melt the butter in a large bowl on low in the microwave or on the stove. Add the sugar, brown sugar, vanilla and whisk until smooth. Add the eggs, one at a time, beating well after each addition. Gradually stir in the flour mixture, then fold in the chocolate chips. Refrigerate overnight. To bake, preheat the oven to 375 F. Drop by rounded tablespoonfuls onto a parchment paper lined baking sheet. Bake for 9 minutes or until light brown around the edges.

Thursday, April 1, 2010

Giada's Fruit Spring Rolls

I used to be infatuated with the Food Network Channel, so much so that it became part of my daily routine. I probably owe to it a big portion of my love of cooking and food. Recently though, my food inspiration has solely come from food blogs. On a nice and relaxing day, I decided to tune into the Food Network once more, for old times sake.
One of my favorite Food Network chef's is Giada de Laurentiis. She's absolutely gorgeous and makes some yummy, yummy food. One of my favorite cupcakes is actually from her! Well, I saw her make this fruit spring roll and I was shocked to say the least! I'm Vietnamese and we do NOT make dessert spring rolls, but if Giada gives it her seal, I'd at least give it a shot.
These were definitely easy and pretty to look at! All those colors make me happy. Tasting it you ask? It was odd. But don't scratch it off your list immediately. The flavors were spot on. The mint and the honey with the fruit, how could you go wrong? I especially loved the lime dipping sauce, which added a subtle zing to the sweetness. I was just surprised by the sweet noodles.
But to be fair, if I has used the Pad Thai noodles it might have tasted better since it has more structure than the vermicelli that I used. Next time, I might just toss all the fruit in the dressing and have at it! I literally love that mint-lime dressing.

Fruit Spring Rolls

Yields: 4 - 6 servings

Original recipe can be found here.


For the rolls:

1 1/2 cups cooked Pad Thai noodles, cooled and drained (I used rice noodles)

1/4 cup honey

1/4 cup packed mint leaves, finely chopped

6 rice paper rounds

6 medium strawberries, stemmed and sliced

1 mango, halved, peeled, seeded and cut into slices

6 tbsn. sliced almonds, toasted


For the dipping sauce:

1/4 cup packed mint leaves, finely chopped

1/4 cup honey

1/4 cup fresh lime juice, 2 - 3 limes


For the rolls, put the noodles in a medium bowl and add the honey and mint. Using 2 forks, toss the ingredients together until the noodles are coated. Dip the rice paper in hot water until thoroughly wet, remove and flatten out on a clean surface. Add some noodles, 3 - 5 strawberry slices, 2 mango slices, and some toasted almonds. Roll the rice paper around the filling like a burrito; first rolling the top over, tucking in the sides, then completing the roll. Repeat with remaining ingredients.


For the dipping sauce, in a small bowl combine the mint, honey and lime juice. Pour into a serving bowl. Serve with the rolls and enjoy!

Thursday, March 18, 2010

Olive Oil Granola

As a baker, you get a lot of praise, because well, you make things that people love and then that love transfers over to you. Nice huh? Well with that said, sometimes I feel like a cheat. Most of the time I use recipes rather than making things of my own doing because baking is a science and one that I haven't particularly mastered yet. I know, I know!


It makes me sad to say I do not whisk these ideas up in my own head and I nod my head in shame when people say, "I love YOUR recipe." Well, thanks but no thanks because it's not my recipe, but that's fine by me too because the joy of spreading good recipes is a reward all in itself. My favorite kind of recipes are the ones you can change to your liking, that way I can feel like the recipe has just a little bit of me in it.


For example, this olive oil granola. I don't even know the path this granola took to find me but the last hand off was Shannalee of Food Loves Writing and boy I'm glad I was next in line for this one! I don't usually eat granola often. Granola bars? Yes. Oatmeal? Yes. Regular ole' granola? No. After reading Shannalee's awesome blog post on this beauty, I knew I had to make it. Well, I did and guess what? I simply love it. Wholesome and filled with all kinds of customizable goodness. Add/ subtract/ change what you'd like, and even with all that math, you still end up with some good eats!


Olive OIl Granola

Yields: about 5 cups

Adapted from here.


3 cups old fashioned rolled oats

1 cup chopped walnuts

1/2 cup almonds, roughly chopped

1 cup coconut flakes

1/4 cup flax seeds

3/4 cup pure maple syrup

1/2 cup extra virgin olive oil

1/2 cup light brown sugar

1 tsp. kosher salt

1/2 tsp. ground cinnamon

1/2 tsp. ground cardamom

heaping 1/2 cup dried apricots, chopped

heaping 1/4 cup dried cherries, chopped


Preheat oven to 300 F. In a large bowl, combine the oats, nuts, flax, coconut, maple syrup, olive oil, brown sugar, salt, cinnamon and cardamom. Spread mixture on a rimmed baking sheet in an even layer (use parchment paper or a silpat to make it easier to transfer the mixture later). Bake for 45 minutes, stirring every 10 minutes, until golden brown and toasted. Transfer granola to a large bowl and add apricots and cherries, tossing to combine.

Wednesday, December 30, 2009

Apple Frangipane Tart

Mmmm I love winter time. It's my favorite time of the year, when the air is just a bit chilly and the leaves have started to fall. Lately though, living in California, has provided little winter for me! So sad. Anyways this tart perfectly pairs with this season.
Tartlette originally makes this tart mini-sized but I decided to make one large tart for my family Christmas party. Though it does seem like there are a lot of steps, once broken apart, this tart was incredibly easy to put together. I made the crust one day and pre-baked it, then another day filled it with the frangipane and baked it, and baked and assembled the apples. This really is a gorgeous tart. It was a big hit too! The combination of honey-roasted apples and almond was just delicious! Make sure not to over bake the frangipane though, because you want it to be moist!
I arranged mine like a flower, but you can do it any other way:
I used Granny Smith Apples:
Apples and fall: the perfect combination

Apple Frangipane Tart

Yields: 8 servings

Adapted from original recipe, which can be found here.


For the sable dough:

1 stick butter, room temperature

3/4 cup powdered sugar

1 large egg

1 1/2 cups flour

2 tbsn. cornstarch

pinch of salt


For the frangipane cream:

1 stick butter, softened

1/2 cup granulated sugar

1 cup ground almond

seeds from 1 vanilla bean or 2 tsp. vanilla paste or extract

2 eggs

1/4 cup heavy cream


For the honey roasted apples:

4 medium apples

1/2 cup honey


2 tbsn. apricot jam or orange marmalade + 1 tbsn. water, microwaved for 15 seconds (to glaze, optional)


To make the dough, in a mixer, cream the butter and sugar until light and fluffy. Add the eggs and mix until combined. Add the flour, cornstarch and salt and mix briefly to incorporate. Dump the whole mixture onto a lightly floured board and gather dough into a smooth ball. Do not work dough while in mixture or it will toughen up. Flatten dough into a disk and wrap in plastic wrap and refrigerate for an hour. When dough is nice and cold, roll out on a lightly floured board or in between sheets of plastic. You need half the amount of dough to make the tartelettes. Other half can be kept in the fridge for up to 5 days or frozen, well wrapped for 3 months. Cut out rounds with a 3 inch pastry ring. Place on a baking sheet lined with parchment paper and bake at 350 F for 8 - 10 minutes. Let cool.


Preheat oven to 350 F. Peel, core and cut the apples in thin slices. Lay them on a couple of parchment paper lined baking sheets and drizzle all with honey. Bake for 10 - 15 minutes until golden, let cool.


Place butter, sugar, almond powder, vanilla and eggs in a large bowl and whisk until smooth. Add cream and stir it in instead of whisking so you don't emulsify it. Refrigerate for 30 minutes. Place 8 baked rounds of dough into 8 pastry rings, divide the cream evenly among the rings and bake for 20 minutes at 350 F. Let cool. Once cool, remove tarts from rings and arrange apples decoratively on top. If desired, you can glaze the tart. Enjoy!


Close up of the apples:
An apple a day keeps the doctor away: