Tuesday, March 31, 2009

Tailored Tuedays

Just really tailored elegance. I love how simple these items are yet their beauty is in the details; the slightly asymmetric lines of the cardigan, the pleats of the skirt, and so on.

1. Burberry Prorsum "Asymmetric cashmere cardigan"
2. Jason Wu "Twistfront tank"
3. Bottega Veneta "Shantung silk skirt"
4. Chloe "Crystal flower earrings"
5. Chloe "Ely medium zip bag"
6. Pedro Garcia "Peggy suede sandals"

all images can be found at net-a-porter.com

Monday, March 30, 2009

Gianduja Brownie Cheesecakes

B loves nuts. I love baking. Therefore anything I bake for him needs to be filled with nuts... or meat (of course). So to celebrate our one year anniversary I decided to make these wonderful brownie cheesecake concoctions. I've had this Gianduja Brownie recipe from Bake or Break bookmarked for a while, so I decided to dust it off and bring it to life, with my own spin of course!

To make them even more delicious, I decided to add a layer of cheesecake to the top. All I can say is... wow! The brownie portion was super moist and the cheesecake was tangy and delicious. The only problem was that they came out kind of ugly and browned. But I quickly fixed that with a dusting of powdered sugar and a drizzle of melted chocolate!

Gianduja Brownie Cheesecakes
Yields: 12 Mini Cheesecakes
Slightly adapted from Bake or Break


For the brownie:
1 1/4 cup hazelnuts, chopped and lightly toasted
4 oz. bittersweet chocolate
3 oz. milk chocolate
1/2 cup of unsalted butter
1/4 cup Nutella
1/2 cup flour
1/2 tsp. baking powder
pinch of salt
1/2 cup sugar
2 large eggs

For the cheesecake:
2 8 oz. packages of cream cheese, at room temperature
2/3 cup of sugar
2 large egg yolks
1/2 tsp. vanilla extract

Preheat the oven to 350 F. Line a cupcake pan with cupcake liners (you could also use a mini cheesecake pan), set aside. Heat the butter and chocolates over medium high heat in a saucepan, whisking constantly until completely melted. Remove from heat. In a large bowl, combine the Nutella, sugar, eggs, salt, and baking powder until well combined. Slowly add the hot chocolate mixture in small batches until well incorporated. Next, whisk in the baking powder, flour, and chopped hazelnuts until well combined. Fill the cupcake liners 1/3 full with the brownie mixture, set aside. In a medium bowl, combine all of the ingredients needed for the cheesecake and whisk until smooth. Layer on top of the brownie batter until the cups are 2/3 full. Tap against the counter to make sure it is well settled in the pan. Bake until edges are slightly puffed and center is set, about 15 - 20 minutes. Let cool completely. Enjoy!

Saturday, March 28, 2009

Chocolate Mint Cupcakes

Girl scout cookies. Really... that's all I need to say to get your mouth salivating and your heart fluttering isn't it? Since finals have been over, I've been dying to make Baking Bites' thin mint and samoa copycats, but honestly after a week of no sleep and being on the verge of death, those were a little too much for me too handle. I thought I'd meet in the middle and make thin mint style cupcakes instead, but I've honestly seen 3 - 5 different versions and I couldn't decide which one to use, so I set up a little experiment:
Specimen #1: Chopped Andes Mints
These came out super, super moist, almost like a chocolate lava cake. It had sufficient mint flavor and was my favorite of the three.

Specimen #2: Chopped Thin Mints
Surprisingly moist, since I thought the crushed cookies might make the cake a little dry, but it didn't have enough mint flavor for me. The crushed cookies did add nice texture though.

Specimen #3: Mint Extract
Definitely minty but still not enough for me. It was kind of just 'blah' if you know what I mean, it was whatevers, I could live without it. 

Final Decision: The one with the chopped Andes mints was definitely the best, it was an out of this world moist but not minty enough for me. None of the cakes were minty enough for me actually. In the end, I decided that if I wanted the gold, I would definitely have to be gutsy, so I added mostly chopped Andes, some chopped thin mints AND mint extract to the final cupcake batter. A little overboard you say?!?! I say NOT! Delicious! The most moist cake you will ever meet and so full of fresh minty flavor. I used Simply Recipes' cream cheese mint frosting which perfectly balanced out these cupcakes with its bit of tang. It was just sweet enough but not overly so.
Chocolate Mint Cupcakes
Yields: 24 Cupcakes


1 box of Chocolate Devil's food cake or 1 recipe of Devil's food cake
1 box of Andes mints
1/4 sleeve of Thin Mints or Keebler Fudge Shop Grasshopper Cookies (5 cookies)
 1/4 tsp mint extract

Make cake batter according to the directions. Chops the Andes mints and thin mints finely, add to the batter. Add the extract and mix well. Divide the batter among a cupcake pan lined with cupcakes liners. Bake until a toothpick inserted into the center comes out clean, about 15 minutes. Let cool completely, then frost.

Mint Cream Cheese frosting
Original recipe can be found here

4 oz. or half a package of cream cheese, at room temperature
4 tbsn. butter, at room temperature
1/4 tsp. of mint extract
1 1/2 cups of powdered sugar
1 - 2 drops of green food coloring

Using an electric mixer, whip the butter and cream cheese together until smooth and creamy. Add the mint extract, then the powdered sugar, 1/2 a cup at a time until well combined. Add the food coloring to your color preference. Frost your cooled cupcakes and enjoy!

Friday, March 27, 2009

I cannot WAIT!

No FFF this week, this trailer is much, much better in my opinion. From Spike Jonze, his adaptation of the beloved children's novel.

Vietnamese Crepes/ Banh Xeo

Banh Xeo is often called the Vietnamese Crepe, although they do kind of look like them, they taste extremely different. A couple weeks ago my family and I were SO excited to see that Anthony Bourdain made a visit to Vietnam. But what REALLY made our day was seeing him eat at the exact same place in Vietnam that we ate for Banh Xeo! Hearing him gush about his love for Vietnam, the people, the food, the country really made me miss my own experiences in my native country. I can't wait until I get to visit again, it really is extraordinary and the food? Completely out of this world.

Banh Xeo usually consists of a rice flour/ coconut milk batter filled with thinly sliced pork, shrimp, and bean sprouts. Since for some reason I absolutely abhor bean sprouts my mom used thinly shredded daikon instead, which was even MORE delicious!

Banh Xeo/ Vietnamese Crepes
Yields: Enough for four


1 1/2 cups of rice flour
1 can of coconut milk, Chaokoh brand preferably 
1 tsp powdered tumeric
4 green onion stalks, sliced
1/2 lb. of pork, thinly sliced 
1/2 small onion, thinly sliced
1 daikon, peeled and thinly shredded
1 cup of raw shrimp
olive oil
salt and pepper
fresh romaine lettuce, mint, and cilantro

Nuoc Cham:
1/4 cup sugar
the juice of 1 lemon
1/3 cup fish sauce
1/2 cup water
2 cloves of garlic, minced
1 carrot, thinly sliced or julienned (depending on your preference)
1 -2 tsp. chili paste, I used Sambal Oelek brand

In a large bowl combine the rice flour, coconut milk, tumeric and green onions, mix well and set aside. Heat a large pan over medium-high heat. Add the sliced pork and cook for about 5 minutes, then add the onions and cook together until pork is completely cooked and onions are translucent, about another 8 - 12 minutes. Set aside. Heat a tablespoon of oil in a large pan over medium high heat. Add about 1 ladle full of the batter. Wait about 30 seconds before adding a handful of the daikon, some pork, and some shrimp. Cook about 5 more minutes until the shrimp is fully cooked, fold in half and place on a plate. Repeat, using more olive oil as necessary. For the sauce, combine all ingredients in a medium bowl, adding more ingredients to your taste. To eat, add bunches of herbs and lettuce to the crepes and pour some sauce over. Enjoy! 
The rice flour/ coconut batter.
Thinly sliced cooked pork with onions, salt, and pepper.
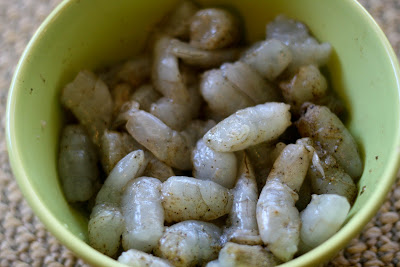
Fresh shrimp seasoned with salt and pepper.
Shredded fresh daikon.
Fresh lettuce, mint, cilantro, and Vietnamese herbs.

Wednesday, March 25, 2009

Soft Pretzel Slabs?

I am a big, big, BIG lover of soft pretzels. I love carbs, I don't ever think I could live my life without pasta, rice, or bread. And if I had too, I'd probably live my life drugged up on uppers or commit suicide. It's really THAT big of a deal to me! I especially love bread that's chewy in texture, that's why Soft Pretzels are my bread soul mate. They're salty, chewy, soft and utterly delicious! 

I've never attempted to make any sort of risen bread before, but I thought it best that pretzels be my first try! I admit, even at this first try, I was quite lazy. I mean I didn't even have the patience to roll them out and twist them, how pathetic can I be?!?? But it didn't matter because these were delicious none the less! Instead of rolling them I just sliced off "slabs" and baked them. Eating them with mustard is a must!!

Soft Pretzels

Yields: 8 pretzels

Original recipe from Sugarlaws, which can be found here


Printable Recipe


1 tsp. active dry yeast

pinch of sugar

1/3 cup warm water

1 1/4 cup flour

2 tbsn. sugar

1/2 tsp. salt

1 tbsn. canola oil

3 tbsn. baking soda

1 cup hot water

sea salt/ pretzel salt


Dissolve yeast into 1/3 cup warm water with a pinch of sugar, let stand for 10 minutes until mixture is creamy colored and bubbly. Mix the yeast mixture with the flour, salt, sugar and canola oil, knead until combined. Let dough rise in a greased bowl until doubled in size, about 45 - 60 minutes. Preheat oven to 435 F, when dough has risen, pinch off a handful of the dough and roll out into a long strand, about 24 inches. Repeat this with the rest of the dough. Once all have been rolled out, take the first strand and stretch it out again (the gluten should have relaxed and you should be able to stretch it out longer). Twist into a pretzel shape (using video below) and place them onto a greased baking sheet. 


Dissolve the baking soda into the 1 cup of hot water, stir until dissolved. Quickly dip each pretzel into the mixture and place back onto the baking sheet. Sprinkle with sea salt/ pretzel salt and bake for about 6 - 8 minutes until golden brown. Serve with grainy mustard and enjoy!


Tuesday, March 24, 2009

Tailored Tuedays

A touch of coral and some costume jewelry to brighten up a monotone work-day outfit. 

1. Theory "Cooper cashmere blend cardigan"
2. Thakoon "Blossom print silk dress"
3. Lanvin "Amalia quilted shoulder bag"
4. Sergio Rossi "Suede platform sandals"
5. Isharya "Polki bib necklace"

all images can be found at net-a-porter.com

Monday, March 23, 2009

Dark Chocolate Peanut Butter Cups

I've been seeing these cute little cups all over Tastespotting and Foodgawker lately and I would have never though to make my own Reeses cups but it seemed like a fun little project and when I saw a version done in dark chocolate, I knew I had to try it! Since I've also been planning on making Bakerella's Cupcake Bites, I bought a candy mold from Michael's that made these super easy to make. 


I decided to use crunchy peanut butter that made it extremely hard to mix, so I suggest not doing that, but if you'd like to work it out, the crunchy bits made it extra yummy! I suggest using the amount of crunchy peanut butter below and then adding two more tablespoons of smooth peanut butter to ease the mixing. The sweetness of the filling balanced out the dark chocolate really well, they were extremely delicious if you love chocolate and peanut butter (I don't know who doesn't) and I can't stand how cute these were!


Dark Chocolate Crunchy Peanut Butter Cups

Yields: 12 - 16 mini peanut butter cups

Original recipe can be found here.


Printable Recipe


8 oz. bittersweet chocolate

1/3 cup crunchy or smooth peanut butter

1/4 cup powdered sugar

1/4 cup crushed graham crackers


In a bowl mix together the peanut butter, powdered sugar, and crushed graham crackers, set aside. Melt the chocolate either by a double boiler or by a microwave in 30 second intervals until smooth. To make the cups you can either use a candy mold or a mini cupcake pan lined with mini liners. Using a pastry brush or a small spoon, spread the melted chocolate along the bottom and sides of the mold or liner. Let harden in freezer for about 10 - 15 minutes. Remove them from the freezer and then fill them with about a teaspoon of the peanut butter mixture, smooth into the bottom of the chocolate cup. Spoon more of the melted chocolate on the top of the peanut butter mixture to cover out to the edges. Put in the freezer again to harden, about 10 - 15 minutes. If desired, melt some white chocolate and use a piping bag to pipe patterns on the top. Enjoy!!!


Sunday, March 22, 2009

Porto's Bakery and Cafe {Glendale, CA}

This place is the best thing to happen since sliced bread... oh wait, they have sliced bread here too! If you've never been to Porto's or even heard of it, I suggest you listen in, and listen well friends. This place is nothing short of AMAZING. It's packed like a sardine can from the time they open to the time they close with offerings such as authentic cuban sandwiches, cuban pastries, and other various delights as well! But the best part? It is SO affordable. You can get high end cakes and desserts at such a great price, which is the heart of why they have been so successful. I mean lunch for $3.00? You have got to be kidding me, especially in times like these, Porto's has maintained great business and great, delicious, amazing, incredibly, delightful food (I could have used about 20 more adjectives there)! Only problem is that it's quite far from where I live, that's why one trip equals us practically buying the whole store to bring home and live on for the next couple weeks!

Refugiado/ Cheese Roll: What Porto's is most famous for! Sugar dusted puff pastry filled with sweet cheese cream. SO delicious, the pastry is absolutely amazing, it no wonder why people die for this stuff! ($7.40 for a dozen)
Refugiados/ Guava Cheese Rolls: Another favorite, just another version of their cheese rolls but filled with delicious guava jam too! The guava flavor is unmistakable, so fresh and like nothing you've ever tasted. ($7.40 for a dozen)
Mango Mousse Cake: two layers of white sponge cake alternated with two layers of creamy, so utterly-fresh mango mouse, topped with whipped cream and a gorgeous assortment of fresh fruit. SO delicious! ($35 dollars for a quarter sheet)

Maariquitas: homemade plantain chips, lightly salted and served with a side of Cuban garlic sauce. This is what they serve with their sandwiches (a perfect accompaniment), and they were so good I bought some to bring home. ($2.15 for a large box with side of sauce)
Meat pie/ Pastel de Carne: delicious and crispy puff pastry filled with seasoned ground beef. Kind of reminds me of something we Vietnamese eat, but a different and equally delicious version. ($7.95 for one dozen)
Papa rellenas/ Potato Balls: Mashed potatoes filled with seasoned ground beef, lightly breaded, then fried to a golden crisp. One of their most popular items and definitely one of my favorites! How could you go wrong with deep fried starch and protein? ($35 for 50 balls)
Italian Cheesecake: Thin layers of white sponge cake, soaked with rum, marscapone cheese, and fresh pears. Basically the only kind of cheesecake my sister will eat because it uses marscapone rather than cream cheese, but this was BEYOND delicious! So creamy and sweet, one of my favorites. ($2.50)
Parisian Chocolate Cake: Devil's food chocolate cake, layered and decorated with chocolate whipped cream and finished with chocolate shavings. We bought this one for my godfather, who is a chocoholic. Though I didn't get to try it myself, he did comment on its amazing-ness multiple times! ($2.50)
Tiramisu: Thin layers of white sponge cake (soaked with espresso) and cream cheese mousse. This one I actually did not like too much. I love, love, love tiramisu but this one was just alright, nothing spectacular. ($3.50)
Mango Mousse Cheesecake: New York style cheesecake with a sponge cake bottom and fresh mango cheese filling. This was by far my favorite of ALL, it was amazingly creamy and filled with fresh mango flavor that was so strong! Basically if you love mango, you would die for this. ($2.50)
Opera: Almond sponge cake soaked in coffee, a layer of chocolate ganache, a layer of mocha buttercream, and topped with chocolate. Another one that I did not absolutely love, I'm sure if Opera's are your thing than you would love this, but I just wasn't that much of a fan of the taste. It was beautiful to look at though. ($2.50)
Tres Leches: yellow sponge cake soaked in a three milk sauce topped with toasted meringue. This was so cute but delicious as well. I love a good tres leches, but I don't think that anything can ever top the tres leches from Felix's Continental Cafe!

FOR LUNCH:

The Ropa Vieja: Cuban style shredded beef sandwich with bell peppers, onions, and tomato sauce on Cuban bread. Really delicious, tender shredded meat! I don't know what else to say that can describe this any better. ($6.55)
The Medianoche: The most famous classic Cuban sandwich filled with slow roasted pork, ham, swiss cheese, butter, mayo, mustard, and pickles on a sweet roll. I love myself a good medianoche, like the one I had at Milk, but this one was really exceptional. The melted, gooey cheese and crisp, tangy pickle really did me in for it! ($ 3.65)
The Pan con Bistec: marinated steak with grilled onions, potato sticks, tomatoes and garlic sauce on Cuban bread. This was insane as well, the steak was so incredibly tender and the crispy potato sticks added new depth that was delicious! I have no picture sorry folks! ($6.55)

Saturday, March 21, 2009

FFF (Friday Flickr Favorites)

I'm still absolutely loving Abby Try Again! As I was wandering her store, I also found her blog, then meandered my way to her Flickr profile... I absolutely died while looking through her images. There's something about them that's so dreamy! Anyway this FFF came a little late due to extreme exhaustion from Finals week. But yay! I am finally done!

Meander her photostream yourself here.
Or her shop here.
Or her blog here.
You can check out the rest of my favorites here.

Tuesday, March 17, 2009

Tailored Tuedays

Yummy, pretty and tailored with a bit of unmatched prints thrown in just for good measure!

1. Erickson Beamon "Glenda multistrand necklace" 
2. Marc Jacobs "Brocade pleated sundress"
3. Smythe "Silk embroidered blazer"
4. Oscar de la Renta "Mosacio platform sandals"
5. Chloe "Paraty medium shoulder bag"

all images can be found at net-a-porter.com

Sunday, March 15, 2009

The "Other" Spring Roll

The word "spring roll" is usually accompanied by thoughts of rice paper filled with fresh vegetables, herbs, and some kind of meat. The most typical ones we eat at home are filled with stewed pork or fresh baked fish. It wasn't until recently that my mom started to make Bò Bía, a Vietnamese spring roll filled with scrambled eggs, chinese sausage, and dried shrimp. Sounds weird doesn't it? Sort of like a breakfast spring roll burrito, but not. Well no matter how strange, it was delicious nonetheless, and now me and my sister beg my mom to make it on a regular basis. And I also begged her for this recipe! 

Most spring rolls are known to be delicate in flavor and light/ healthy but these must be the bad sheep in the family because they explode in your mouth with intense flavor from the dried shrimp and dipping sauce. They are also much heavier than their goody-two-shoes cousins, making them more of a full meal rather than an appetizer. In conclusion, I LOVE these things!
Vietnamese Shrimp and Sausage Spring Rolls/ Bò Bía
Yields: enough for 4 - 6 people


For the spring rolls:
10 eggs, lightly beaten
1 package of Chinese sausage/ Lap Cheung (8 links), sliced
1 small onion, thinly sliced
3 carrots, peeled and julienned
2 medium jicama, peeled and julienned
3 tbsn. olive oil
iceberg lettuce
fresh mint
1 package of rice paper, banh trang

For the sauce:
3 garlic cloves, roughly chopped
10 tbsn. of hoisin sauce
2 tbsn. peanut butter
4 tbsn. water
1/4 cup of roasted peanuts, chopped

In a medium pan, heat 1 tbsn. of olive oil over medium high. Add the jicama and carrots and cook until tender, about 7 - 9 minutes. Move the vegetables onto a large plate. Using the same pan, heat the other tbsn. of olive oil. Next add the onion, cook for about 3 minutes, then add the dried shrimp. Cook together until onion is tender and flavors are melded, about 5 - 8 more minutes. Remove from pan onto the plate. Next, add the sliced sausage and heat through, letting it get a little crispy. No need to add extra oil for the sausage. Remove from pan onto the plate, side by side with the other ingredients, this way you can make easy spring rolls using an assembly line. Next add the last tbsn. and heat through. Cook the eggs, scrambled style, about 3 - 5 minutes. Set on large plate as well. 

To assemble, fill a large bowl with warm water. Take one sheet of rice paper and submerge into the warm water, then shake off any excess water and lay it on a plate. First lay down some lettuce and mint leaves. You do not want to overstuff your spring roll or else it will just rip apart and become very un-fun to eat. Add about 2 tbsn. of the egg, 4 slices of the sausage, 1 tbsn. of the jicama/ carrot slaw, and 1/2 tbsn. of the shrimp mixture. To roll, first bring the top flap over the filling, tuck in the sides, and roll the whole thing forwards, similar to how you would roll a burrito. Repeat until all fillings are used. Watch the video below to see the details!

In a small saucepan, heat the garlic over medium high until slightly browned. Next add the hoisin sauce and the peanut butter. Stir constantly to make sure they become well combined. Next add the water to dilute the sauce a little. Remove from the heat and mix in the peanuts. The recipe for this sauce varies from person to person as preferences are different, so just add less or more of any ingredient to find a combination that suits you well. Once well combined it is ready to eat with your perfectly rolled spring rolls. Enjoy!