Tuesday, December 28, 2010

Tailored Tuesdays

Oh hey, perfect weekend outfit!


Thursday, December 16, 2010

Chocolate Strawberry Tart

I really love giving gifts. But, let me rephrase that, I really love giving heartfelt gifts. Giving a gift that's barely thought out or mindlessly chosen is not the kind of thing I'd want to impose on someone, nor would I ever want to receive it. Yes, sometimes, a hand crafted or handpicked gift is not as useful, as say, a gift card but I think it really is the thought that counts. I mean it's a popular phrase for good reason.
That's why one of my most favoritist gifts to give are baked creations. They involve time, work and love - and bonus, they make people extremely happy! It just works out perfectly for me because I love to bake and I love to try out new recipes, but for sake of not overeating myself into oblivion, I can joyously offer my goods to my friends, family, and loved ones. 

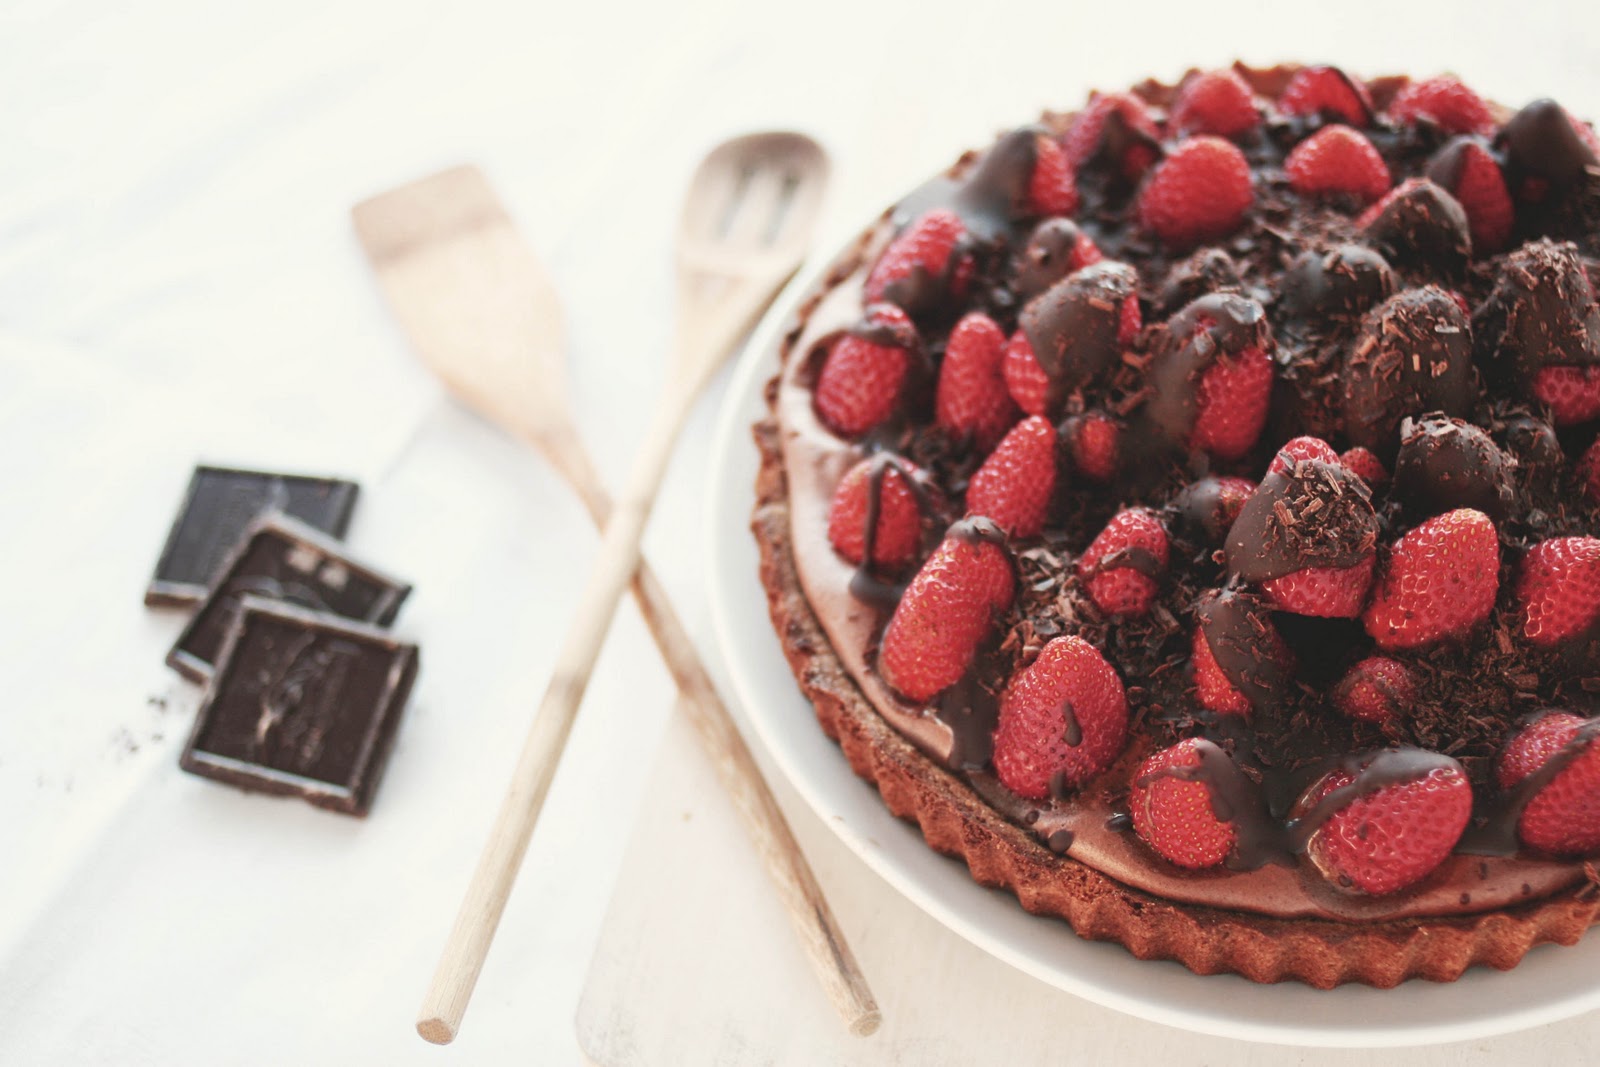
This strawberry tart is inspired by a tart I had from a lovely bakery, Zov's in Tustin. With a sugar cookie crust, chocolate mousse filling, fresh strawberry crown and chocolate ganache, this tart boasts of many decadent components. Yes, it sounds a bit frightful, but take each step one at a time, and you'll be a tart master in no time! 

I kind of over baked the tart shell slightly but it still turned out delicious. A chewy crust with impossibly smooth chocolate mousse. Ideally though, this tart would be best made in the summer, when strawberries are sweeter to contrast with the bittersweet chocolate mousse. 

Chocolate Strawberry Tart
Yields: 1 9-inch tart
Mousse recipe here.

Sugar cookie dough, store bought or homemade
Chocolate shavings, for decoration (optional)

For the chocolate mousse:
3.5 oz. bittersweet or semisweet chocolate, finely chopped
1 1/2 tbsn. water
2 large eggs, at room temperature, separated
pinch of coarse salt

For the chocolate glaze:
6 oz. bittersweet or semisweet chocolate, finely chopped
6 tbsn. unsalted butter
1/2 tbsn. light corn syrup
2 tsp. water

To make the mousse, combine the chocolate and water in a heatproof bowl set over a pan of simmering water. Heat the chocolates until it is almost completely melted, siring occasionally. Remove the bowl from the heat and stir until the mixture is smooth. Set aside and let cool to near room temperature. In a clean, dry bowl of a stand mixer fitted with the whisk attachment, combine the egg whites and salt. Whip on medium speed until stiff peaks form - they should be thick and smooth. Stir the egg yolks into the cooled chocolate mixture. Add 1/3 of the whipped egg whites to chocolate and fold gently to lighten up the mixture. Fold in the remaining egg whites gently just until no visible streaks are left. Spread onto the cooled tart shell and refrigerate for at least 3 hours. Top with fresh strawberries. 


With your prepared sugar cookie dough, press the dough into a 9" or 10" tart pan (with releasable bottom). Make sure to go up the sides and that the dough is even all around the pan (about 1/2 cm thick). Bake according to package directions until golden brown all over. The dough will puff up, so while it is still hot, use the back of a large spoon to press down the center of the hot dough to make a well so that you can fill it with mousse later. Set aside to cool completely. To make the glaze, combine all of the ingredients in a small heatproof bowl set over a pan of simmering water. Stir frequently until the chocolate is almost completely melted, but do not overheat. Remove the glaze from the water bath and set aside to finish melting, stirring once or twice until perfectly smooth.

To assemble, place your sugar cookie tart shell onto your serving plate. Pour about 1/4 cup of the glaze (just enough to cover the bottom) into the bottom of the tart shell and use a spoon to spread evenly across the bottom. Place in the refrigerator to set, about 10 minutes. Once set, spread the chocolate mousse into the tart shell, and top with hulled strawberries (tips pointing upwards). Use the remaining glaze to pour on top of the strawberries, then sprinkle with chocolate shavings and allow to refrigerate for at least 2 hours to set.

The strawberries are playing peek-a-boo!

Tuesday, December 14, 2010

Tailored Tuesdays

Let's get cozy!


Monday, December 13, 2010

Bottega Louie {Los Angeles, CA}

Bottega Louie is one of those restaurants that has mastered being both trendy and worthwhile. It's a place where, on a good day, which is about every other day, you can find a posh looking celebrity chowing on some great eats. 
To me, a restaurant shines in its details. Here, at Bottega Louie, they've got the details down pat. They have complimentary still and sparkling water which they pour at your table in these gorgeous glass bottles, and then leave on your table for self-pouring as needed. At the same table, you'll find little salt and pepper shakers. But these aren't your typical salt and pepper shakers, oh no. You'll notice that they have Himalayan pink salt!
Right when you are seated you'll also be greeted with little loaves of bread. Crusty and served right on the table. Oh, and paired with homemade jam and butter to boot! I wish the bread was served warm though.
To drink, we opted for their green tea mojitos, which is their clever concoction of green tea and mint, and a vanilla latte. The latte was splendid as well.
After reading many reviews on Yelp, I deduced that the Portobello fries were a necessary order. Meaty, chewy and a bit crispy on the edges and served with some sort of aoili. I was already stuffed and satisfied from munching on these, but we had much more to come!
My favorite dish probably had to be the mache salad with roasted chicken, avocado and lemon. It was lightly dressed, really fresh, and reminded me of a Vietnamese dish. It was really fantastic. 
The eggs benedict were enjoyed by a friend, who lives and breathes for eggs benedicts and who self-proclaims herself as an eggs benedict fiend. She said this one was among her top 3 that she's tried.
Lastly for lunch, we got the clam pizza. No, there was not any clams on the pizza, sadly. But with roasted peppers, and gooey ooey cheese, it was still good. Though I enjoyed the chewiness and crispy edges of the dough, this was not my favorite. It was enjoyable, just not spectacular.
Wandering their desserts was like walking through a mine field, each way I'd look there'd be an explosion of cuteness. Their selection of cupcakes makes me insanely jealous because they are too damned beautiful!

To take home, we settled on some French macarons. When choosing them, I was slightly disappointed because they didn't seem like they had much of a selection and pretty basic ones at that. But upon tasting them, I was definitely surprised. They were the freshest, most moist and light macarons I've had. The cookie almost melted in my mouth! My favorites are still Paulette, but these are definitely second.

Friday, December 10, 2010

14 Actors Acting


 Fourteen Actors Acting
A video gallery of classic screen types.


It's always refreshing to see artists so involved in their craft. Besides, it also doesn't hurt to watch James Franco kiss... himself!


You can watch the videos, here.

Directed by Solve Sundsbo.
Music by Owen Pallett.
Produced by The New York Times Magazine.

Thursday, December 9, 2010

Pasta with Baked Tomato Sauce

I think it's so funny, or I guess interesting, how much we learn as we grow up. Not only what we learn, information wise, but what we learn to like or dislike. As a kid, I used to hate tomatoes, onions, garlic and avocado - I know I'm really kicking myself about it.
Over time, I don't know what happened, all of a sudden they all began to just grow on me and now, well now, I love them, can't live without them! This pasta is just a simple, comforting meal. Just roast off some tomatoes, toss with some spaghetti and top with a drizzle of really good olive oil. Really, it's that simple. 
Mmmmm carbohydrates!

Pasta with Baked Tomato Sauce
Yields:
Original recipe here.

1/3 cup extra virgin olive oil
1 lb. very ripe cherry tomatoes, halved
1/3 cup plain dry breadcrumbs
1/4 cup freshly grated Parmigiano
2 garlic cloves, finely chopped
salt and freshly ground black pepper
1 lb. pasta, cooked al dente
1/4 cup loosely packed basil leaves, torn

Preheat the oven to 400 F. Grease a 13x9" baking dish with 1/3 of the olive oil. Place the tomatoes cut side up in the dish. In a small bowl, combine the bread crumbs, cheese and garlic and toss with a fork to mix well. Sprinkle the mixture over the tomatoes, making sure that each cut side is well covered with the crumb mixture. Sprinkle with salt and pepper. Bake until the tomatoes are cooked through and starting to brown on top, about 20 minutes. When the tomatoes are done, add the basil and stir vigorously to mix everything into a sauce. Add the pasta to the baking dish, then top with the remaining olive oil and toss well. 

Tuesday, December 7, 2010

Red Velvet Hot Cocoa with Cream Cheese Whipped Cream


It seems like recently, my diet has consisted wholly of hot chocolate, soups and my any type of salad topped with my favorite new green apple vinaigrette (recipe soon)! Seriously though, I've been sipping on hot chocolate or some kind of homemade latte every other day, if not every day. This is probably because of my innate need for all things holiday to consume me. 

I'm the kind of girl who loves her winter weather. Although, you and I might have awful different ideas about what 'winter weather' means. As a born and raised Southern California girl, winter to me means: intermittent rains, 2 -3 layers of clothing tops, no sight of snow whatsoever and teeth chattering at the 70 degree mark. I know, I know, it's not much of a winter but it's what we've got!

Anyways, along with Christmas music, this red velvet hot chocolate is all I need to keep me warm on these cold Californian nights. The thing that makes this hot chocolate "red velvet" is merely coloring but the thought is cheerful in itself! You'd be surprised by how a little bit of color can make a cup of hot cocoa seem all the more merrier. The addition of cream cheese frosting though... purely decadent and the perfect pairing. I was always a firm believer that real red velvet deserves cream cheese frosting and not that vanilla buttercream nonsense. 


Red Velvet Hot Cocoa with Cream Cheese Whipped Cream
Yields: 4 servings
Original recipe here.

4 cups whole milk
1 dash water
3/4 cup semi-sweet chocolate chips
1/4 cup sugar
1 tsp. red food coloring
1 cup heavy whipping cream
2 - 4 tbsn. whipped cream cheese, room temperature

In a stand mixer, combine the heavy cream and sugar. Whip on medium speed with the whisk attachment for 2 - 3 minutes. Just before peaks form, add the cream cheese and whisk for another 2 minutes. Taste and add more cream cheese to taste. Be careful not to over whip though, or else you'll have butter! In a medium saucepan, heat the milk over medium heat. Add a splash of water and the chocolate chips, constantly stirring gently. When almost melted, add the red food coloring and stir. When the chocolate chips are thoroughly melted, pour the hot chocolate into mugs and top with the whipped cream.

Tailored Tuesdays

I love me some camel!

Got a really similar camel coat from Uniqlo when I visited NY, swoooon!


1. Vanessa Kandiyoti "Diamond and savorite evil eye necklace"
2. Alexander Wang "Textured wool-blend oversized jacket"
3. Diane von Furstenberg "Belted stretch silk dress"
4. Judith Leiber "Slender curve fine crystal embellished clutch"
5. Jimmy Choo "Private suede sandals"

All images can be found at net-a-porter.com.

Friday, December 3, 2010

Lemon Sabayon Tartlettes

These may be called 'Little Lemon Tarts' but there sure is nothing little about their flavor. Lemons are like little balls of sunshine, they bring joy to everything they take part in. That being said, it must be nice to be a lemon! And it must be even lovelier to be made into a pretty little tart and enjoyed by many. 
These lemon tarts have many counterparts, but really you could easily simplify them. The candied lemon peel and meringue are not necessary but just pretty little add-ons. But don't get me wrong though, they are delicious little add-ons! 


I really loved the lemon sabayon of this tart - it was the perfect balance of sweet and tart. The tart dough, on the other hand, was less loved. Though it was easy to make and put together, it wasn't my favorite tart dough. It shrank, which made it stumpy and thick. I made it again using a sugar cookie dough which I liked a lot more. It was nice and chewy and added a perfect sweetness. 
Lemon Sabayon Tartlettes
Yields: 1 9-inch tart or 8 - 10 mini tarts
Sabayon recipe here. Tart dough recipe from Dessert Fourplay by Johnny Iuzzini. 


For the tart dough:
3 1/2 cups flour
4 tsp. sugar
1 tsp. coarse salt
1 tsp. baking powder
12 tbsn. cold, unsalted butter (cut into pieces)
about 1 cup whole milk


For the lemon sabayon:
2 large eggs, cold
2 large egg yolks, cold
3/4 cup sugar
1/2 cup fresh lemon juice (reserve the lemon peels)
6 tbsn. cold, unsalted butter, cut into pieces


For the meringue (optional):
2 egg whites
1/4 + 1/8 cup sugar


For the candied lemon peel (optional):
reserved lemon peels
1 cup sugar, plus extra for dusting
1 cup water


To make the tart dough, put the flour, sugar, salt, baking powder in a food processor and pulse to combine. Add the butter and pulse until the mixture is crumbly. Add 1/2 cup of the milk and pulse again until the dough starts to come together. Turn the dough out into a bowl and gather it into a ball. If the dough is still a bit dry, add a little more milk, tossing the dough with your fingers (you may not need all of the milk). Shape the dough into a brick, wrap in plastic and refrigerate at least 1 hour before serving. The dough will keep for 3 days in the refrigerator and for several months in the freezer. Defrost before rolling. To pre-bake, roll out the dough to fit your mini tart pans. Bake at 350 F for 10 - 12 minutes or until golden brown. 

To make the sabayon, bring about 1 1/2 inches of water to a boil in a pot that is slightly smaller than the diameter of the bowl you will be using for the sabayon. Meanwhile, in a large metal bowl, whisk the whole eggs plus additional egg yolks and sugar for about a minute or until the mixture is smooth. Set the bowl over the pot and, using a whisk, whip the mixture while you turn the bowl (for even heating). After about 2 minutes, when the eggs are foamy and have thickened, add 1/3 of the lemon juice. Continue to whisk vigorously and, when the mixture thickens again, add another 1/3 of the lemon juice. Whisk until the mixture thickens again, then add the remaining lemon juice. Continue whisking vigorously, still turning the bowl, until the mixture is thickened and light in color and the whisk leaves a trail in the bottom of the bowl. The total cooking time should be 8 - 10 minutes. 

Turn off the heat and leave the bowl over the water. Whisk in the butter a piece at a time. The sabayon may loosen slightly, but it will thicken and set as it cools. Pour the warm sabayon into the tart crust and place the pan on a baking sheet. Preheat the broiler. While the sabayon is still warm, place the tart under the broiler. Leaving the door open, brown the top of the sabayon, rotating the tart if necessary for even coloring (this will only take a few seconds, so do not leave the oven). Remove the tart from the broiler and let it sit for at least 1 hour before serving. 

To make the meringue, combine the egg whites and sugar in the metal bowl of an electric mixer. Bring an inch of water to boil then place the metal bowl on top. Whisk constantly until the sugar is completely dissolved. Once dissolved, remove and place back into the electric mixer. Whisk until peaks form, about 5 - 7 minutes. To make the candied lemon peels, remove any excess white piff from the peels (this is the bitter part), then slice the peels however you'd like. Bring the water to a boil, then add the lemon peel and boil for 5 minutes. Remove the peels, add the sugar to the hot water and bring to a boil again. Toss the lemon peels back in and boil until translucent (about another 5 minutes). Drain the peels then toss them in some sugar to coat. Let them dry on a counter for about 2 - 4 hours. To assemble, spoon the lemon sabayon into the pre-baked tart shells. Pipe the meringue on top of the lemon sabayon in whatever fashion you'd like, then top with some candied lemon peels!